
Download the Helper app for your operating system from the Picaxe site.
On various Linux distributions this step might get a bit tricky. Linux also will assign a serial port to the device, but S2Bot won’t be able to automatically detect which one.
You need to figure out which is the serial port device associated with BLED112. Open up a terminal and issue the dmesg command. It will print out a long list of events. Among the last few lines you should be able to spot the entries that were logged when you’d connected the dongle. We’ve highlighted the lines you should look for.
				[ 3800.890132] usb 1-1.2: new full-speed USB device number 10 using ehci-pci

				[ 3800.987529] usb 1-1.2: New USB device found, idVendor=2458, idProduct=0001

				[ 3800.987539] usb 1-1.2: New USB device strings: Mfr=1, Product=2, SerialNumber=3

				[ 3800.987544] usb 1-1.2: Product: Low Energy Dongle

				[ 3800.987548] usb 1-1.2: Manufacturer: Bluegiga

				[ 3800.987552] usb 1-1.2: SerialNumber: 1

				[ 3800.989485] cdc_acm 1-1.2:1.0: ttyACM4: USB ACM device
Notice the “ttyACM4” device name in this example. In your case the number will likely to be different, and your system might assign a ttyUSBx device instead of a ttyACMx one.
Take a note of the device name.
After downloading LinS2Bot, start the application. Make sure you know the serial device name associated with your BLED112 dongle.
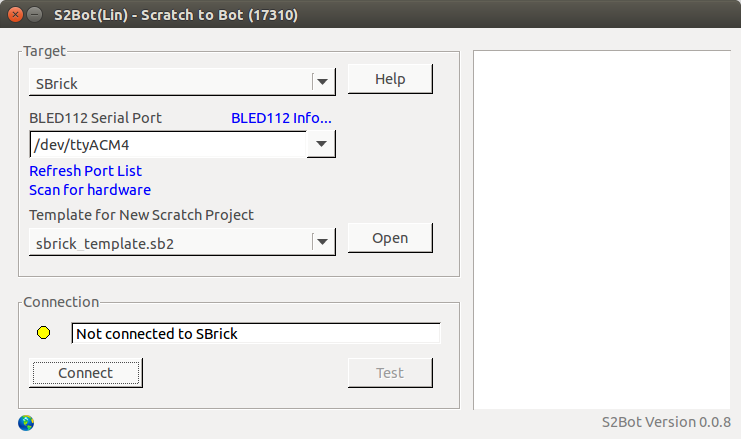
You should see the LinS2Bot application window. Choose the correct serial device from the list provided. You can also enter any device name you like, not just the ones on the list.
Select “sbricktemplate.sb2” from the “Template for New Scratch Project” selection box.
Click the “Connect” button. This will bring up a dialog box showing nearby SBricks.
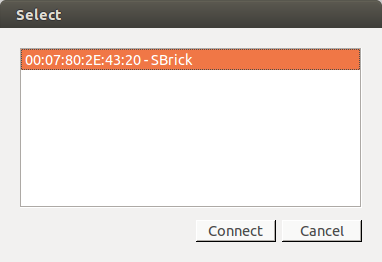
Choose an SBrick from the list and click “Connect”.
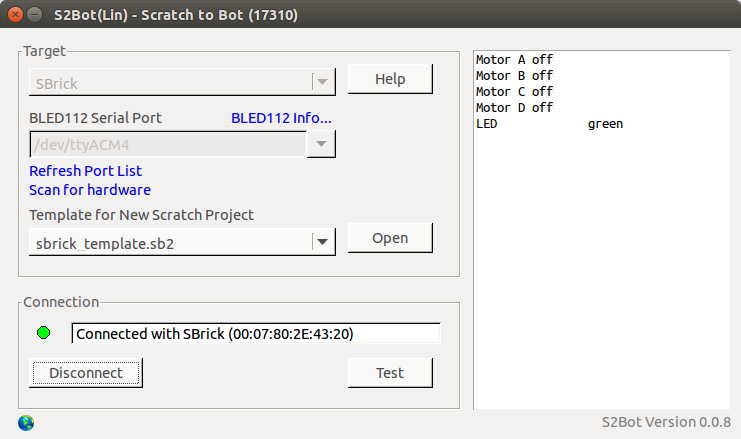
S2Bot should set up the connection to the SBrick in a few seconds. Click “Test” to make sure it works OK.
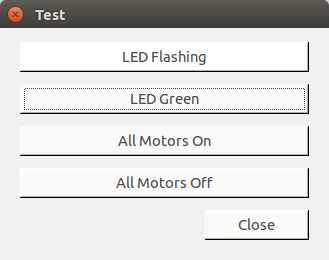
The test dialog box should come up. You can turn on LED identification by clicking on “LED Flashing”, and turn it off by clicking “LED Green”. You might want to test motor control too. Be careful, your model might run off your desk and/or grind it’s gears.
You need a “template” file for Scratch to be able to communicate with SBrick from scratch. This template file contain extra Scratch blocks for SBrick control, and a description of how to speak to S2Bot.
You’ll find these template files in S2Bot’s installation directory. Look for “sbrick_template.sb2” in the “templates” directory.
Start a new Scratch project. From the “File” menu, choose “Upload from your computer”. Choose templates/sbrick_template.sb2 from S2Bot’s installation directory.
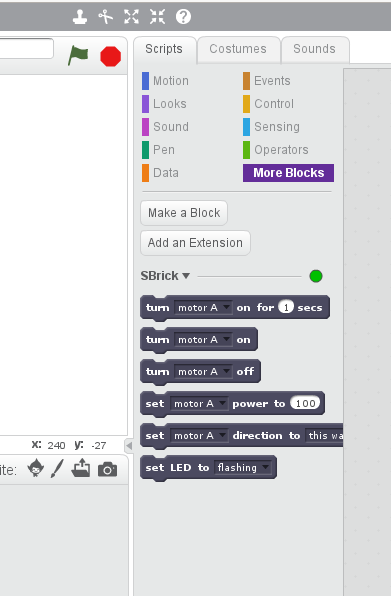
After this you’ll find blocks necessary to control SBrick under “More Blocks”. The green circle on the right of the “SBrick” label means that Scratch is connected to an SBrick via S2Bot.
A yellow circle means that a connection to S2Bot could be made, but no SBrick is connected currently. A red circle means no connection to S2Bot.
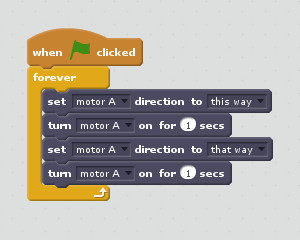
You can write a small demo program that moves a model back and forth:
If you are a teacher, school or camp that is interested in putting SBrick into your classrooms, please contact us at info@sbrick.com. Educators are eligible for a special educators-only discount.
