
Download the SBrick Scratch Plugin form here:
https://apps.sbrick.com/windriver/SBrickSetup.exe
Important! If your PC don’t have Bluetooth 4.0, you must to use a bt 4.0 adapter.
For example: https://amzn.com/B00DJ83070/
(it won’t work with BLED112 dongle).
If the SBrick Scratch Plugin is successfully installed on your PC, just start it, turn on your SBrick and follow the follow the following instructions:
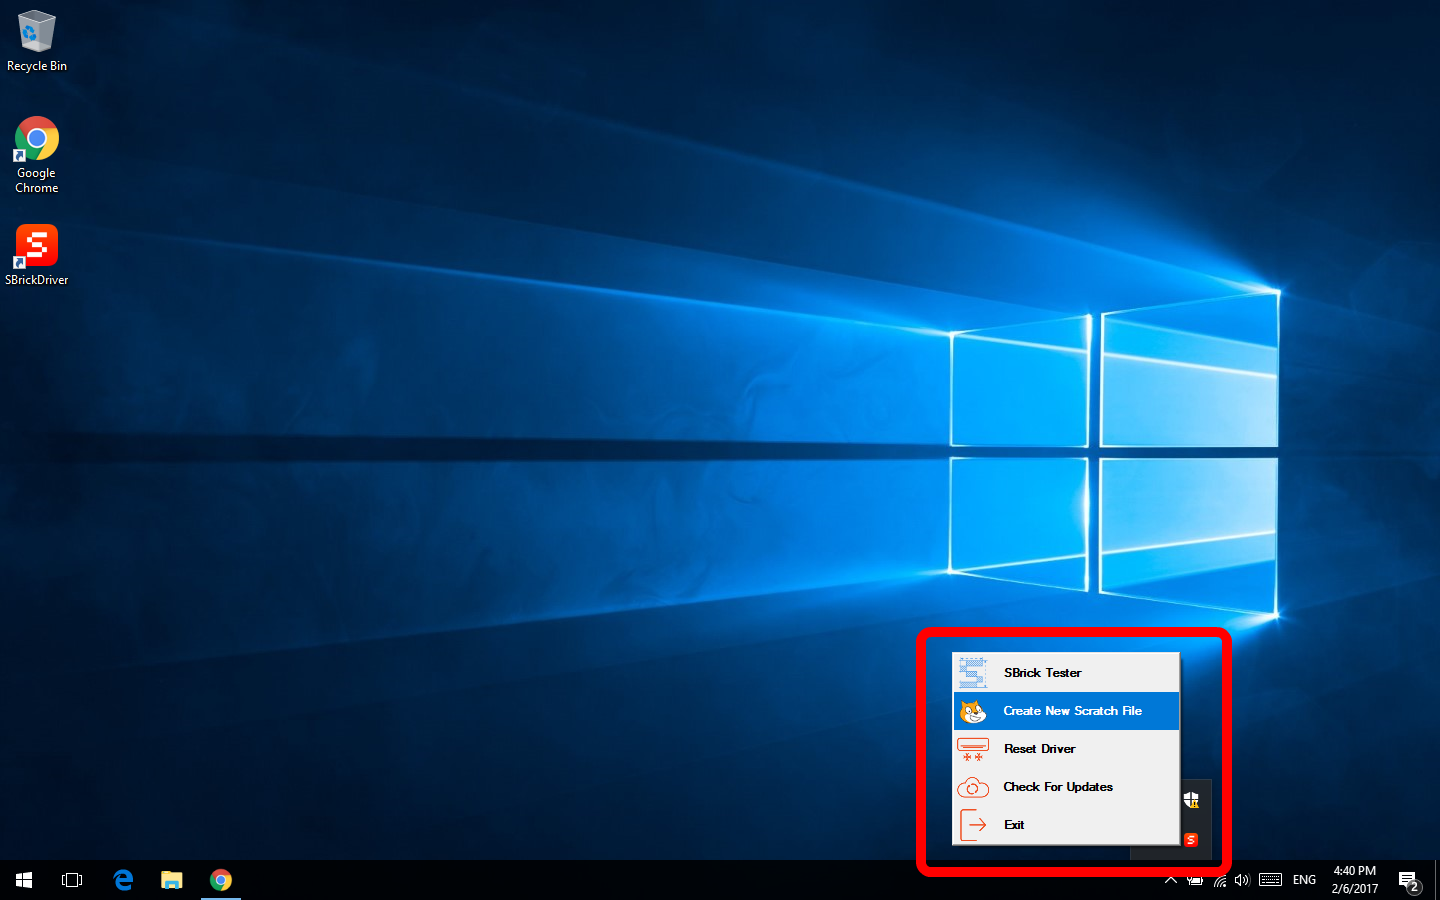
1. Open your Windows notification area in the bottom right corner and open the SBrick menu by clicking to the SBrick icon by "right click".
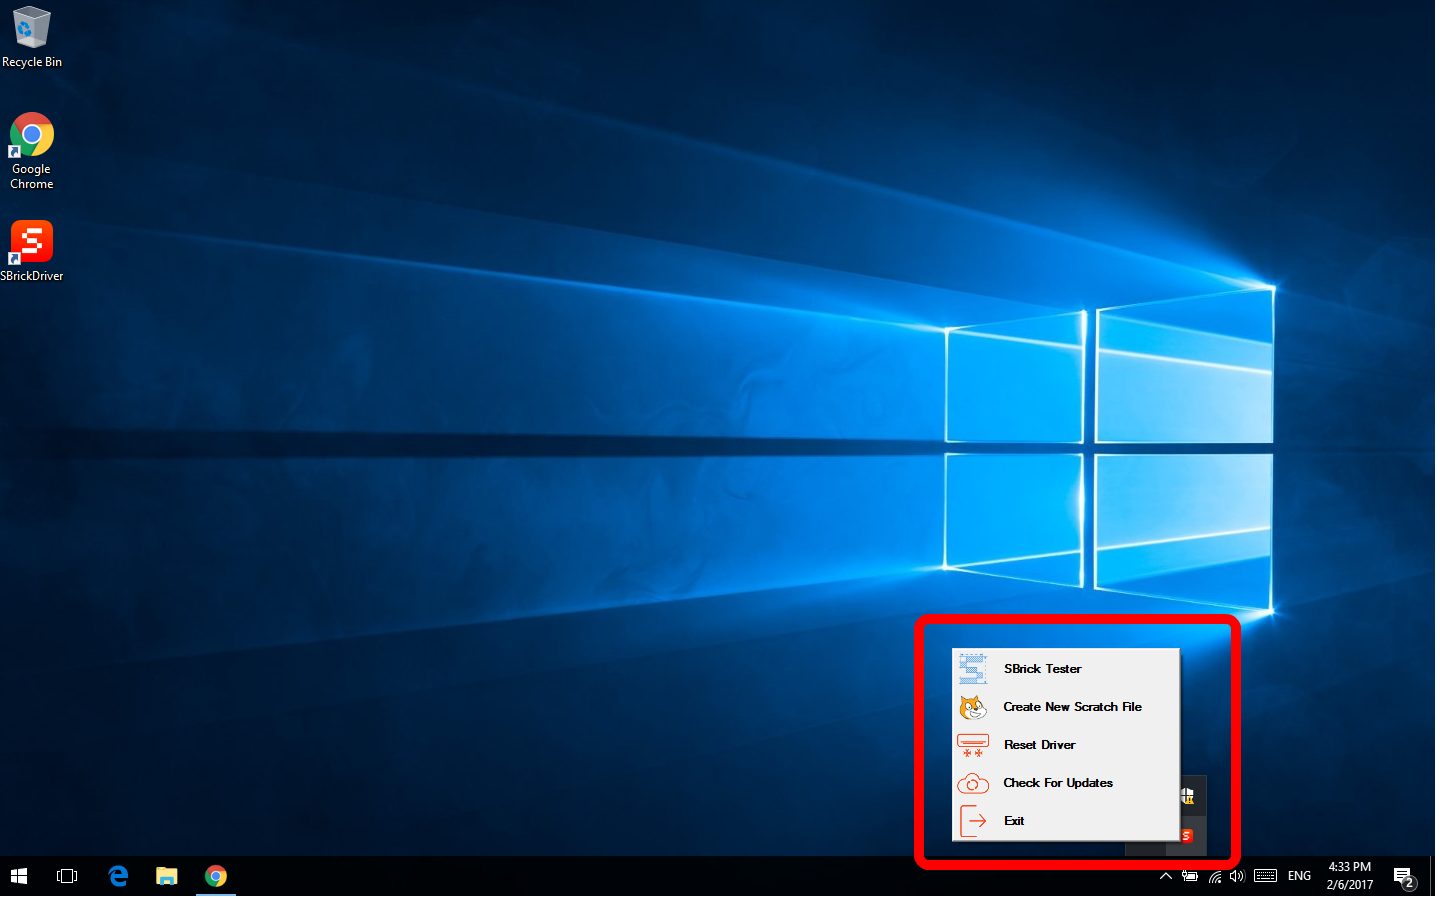
2. Open the SBrick Tester menu. In this menu you will see all of your powered SBricks.
You can recognize the SBrick Plus easily thanks for the small red star symbol (⋆) after the SBrick’s name.
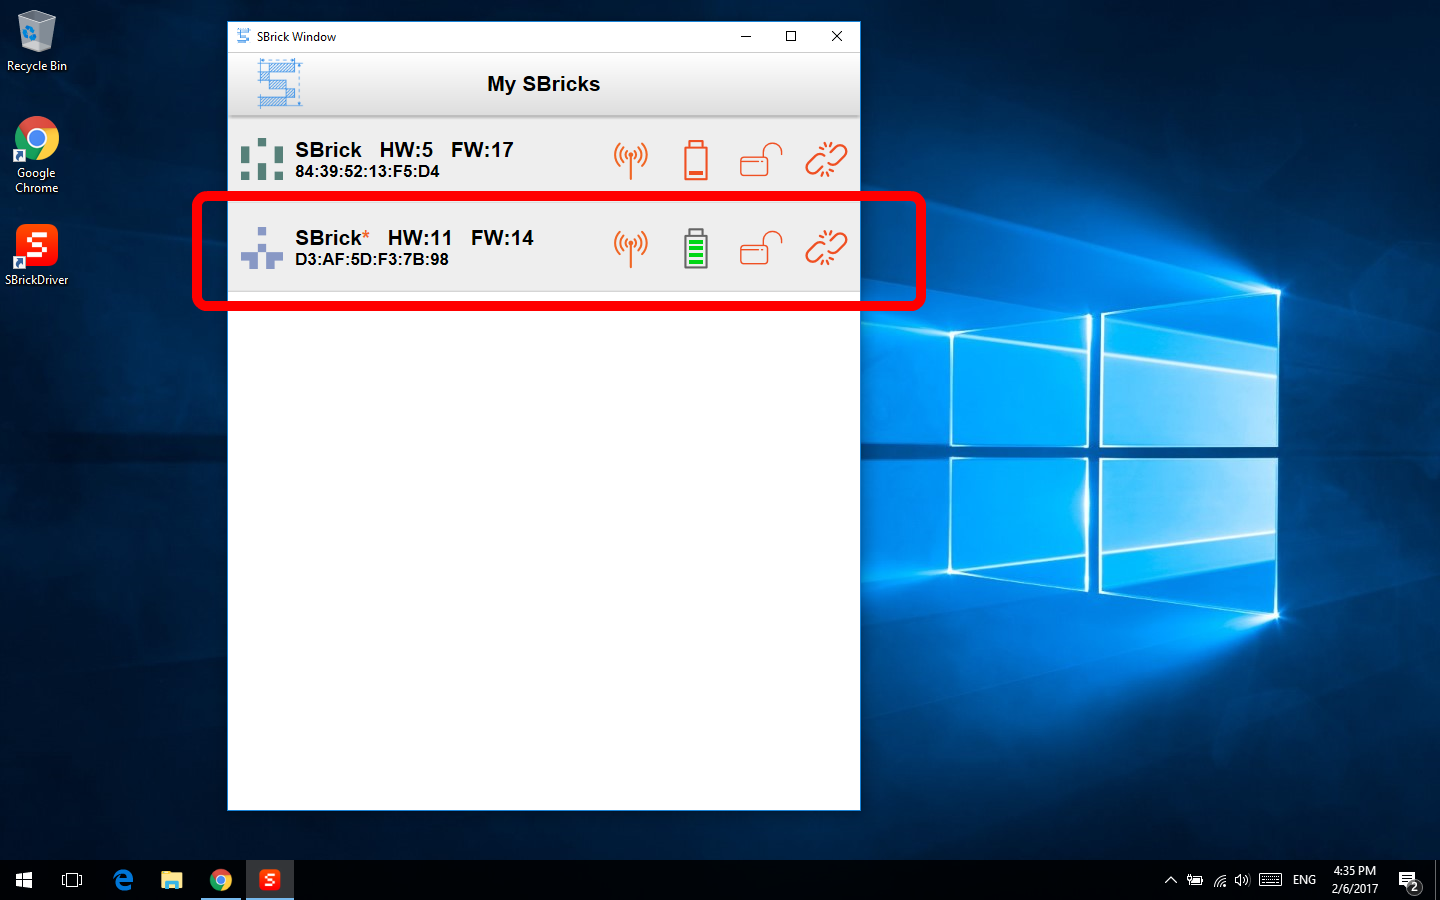
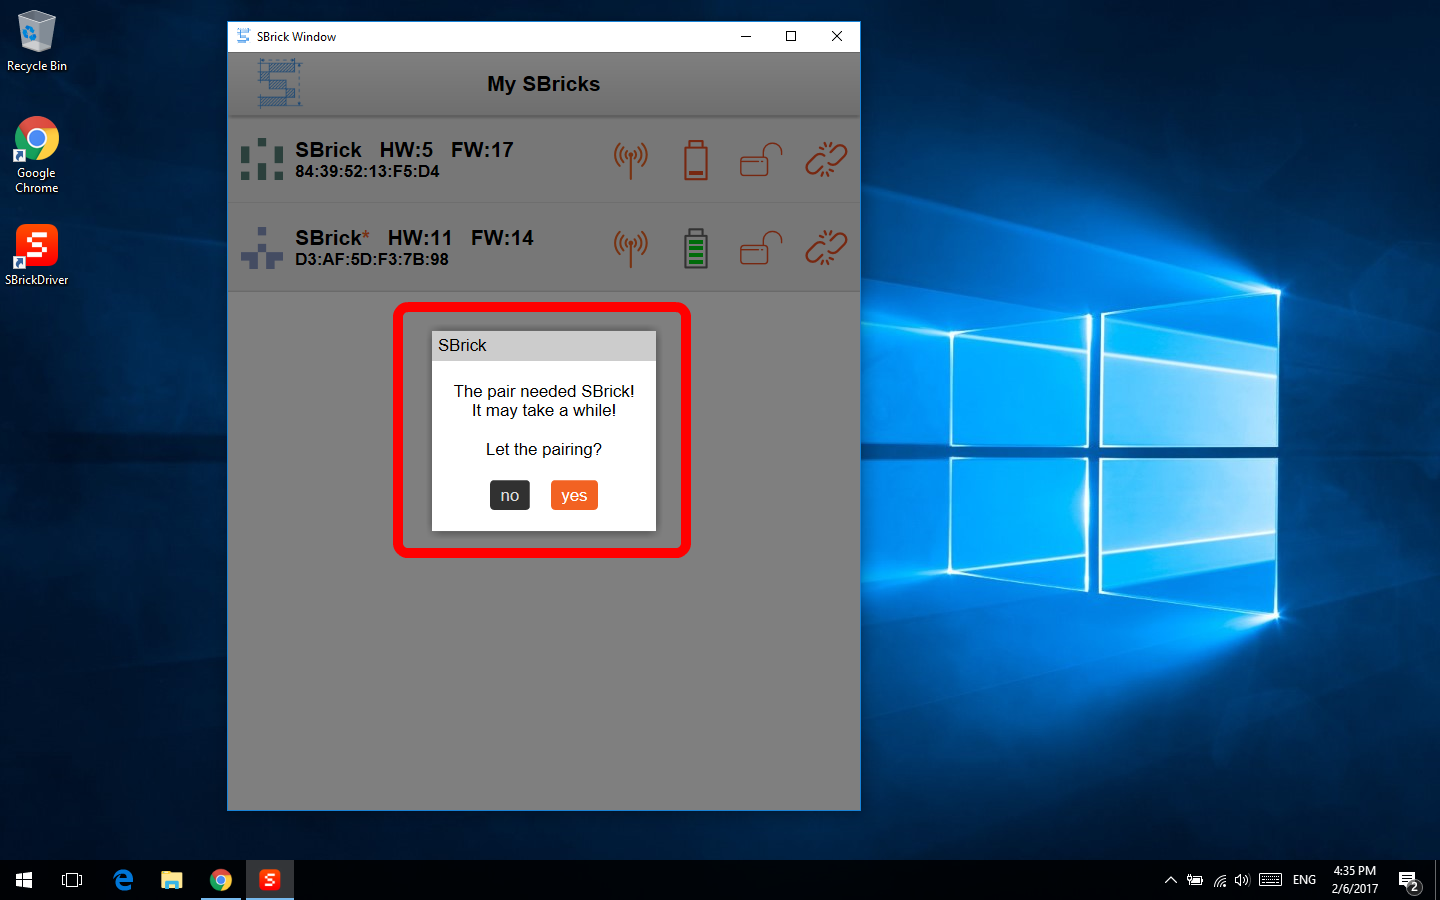
3. You need to pairing the SBricks to your PC. For this, just click to the SBrick, then select the "YES". (After you paired the SBrick to your PC, this message won’t show up anymore)
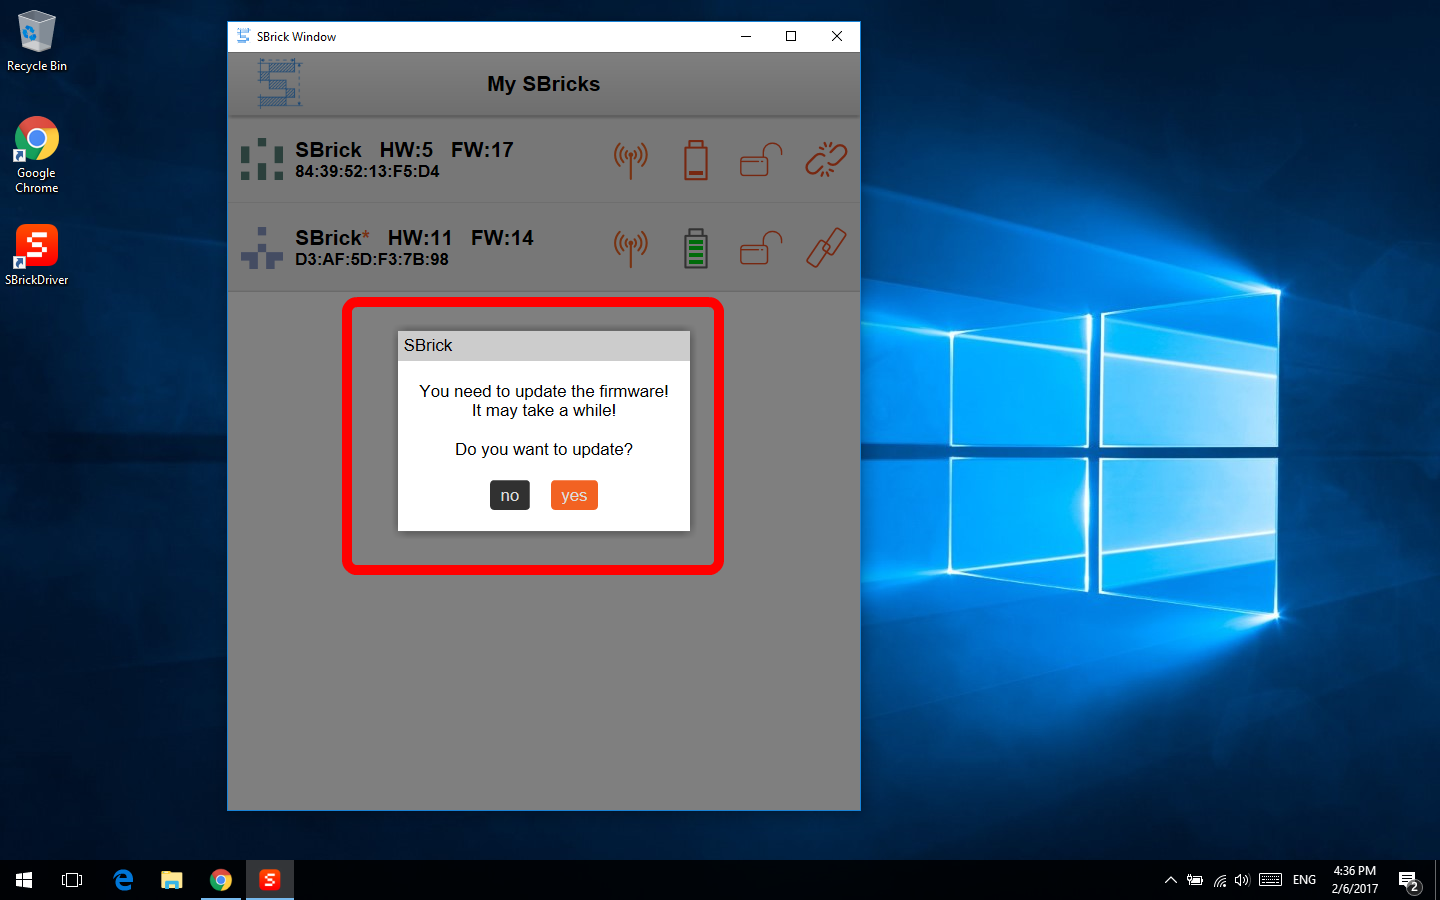
4. After the pairing process you need to click to the SBrick again. At this step the plugin will check your SBrick’s firmware automatically. If a latest firmware available please click to the YES, and the plugin will update your SBrick’s firmware.
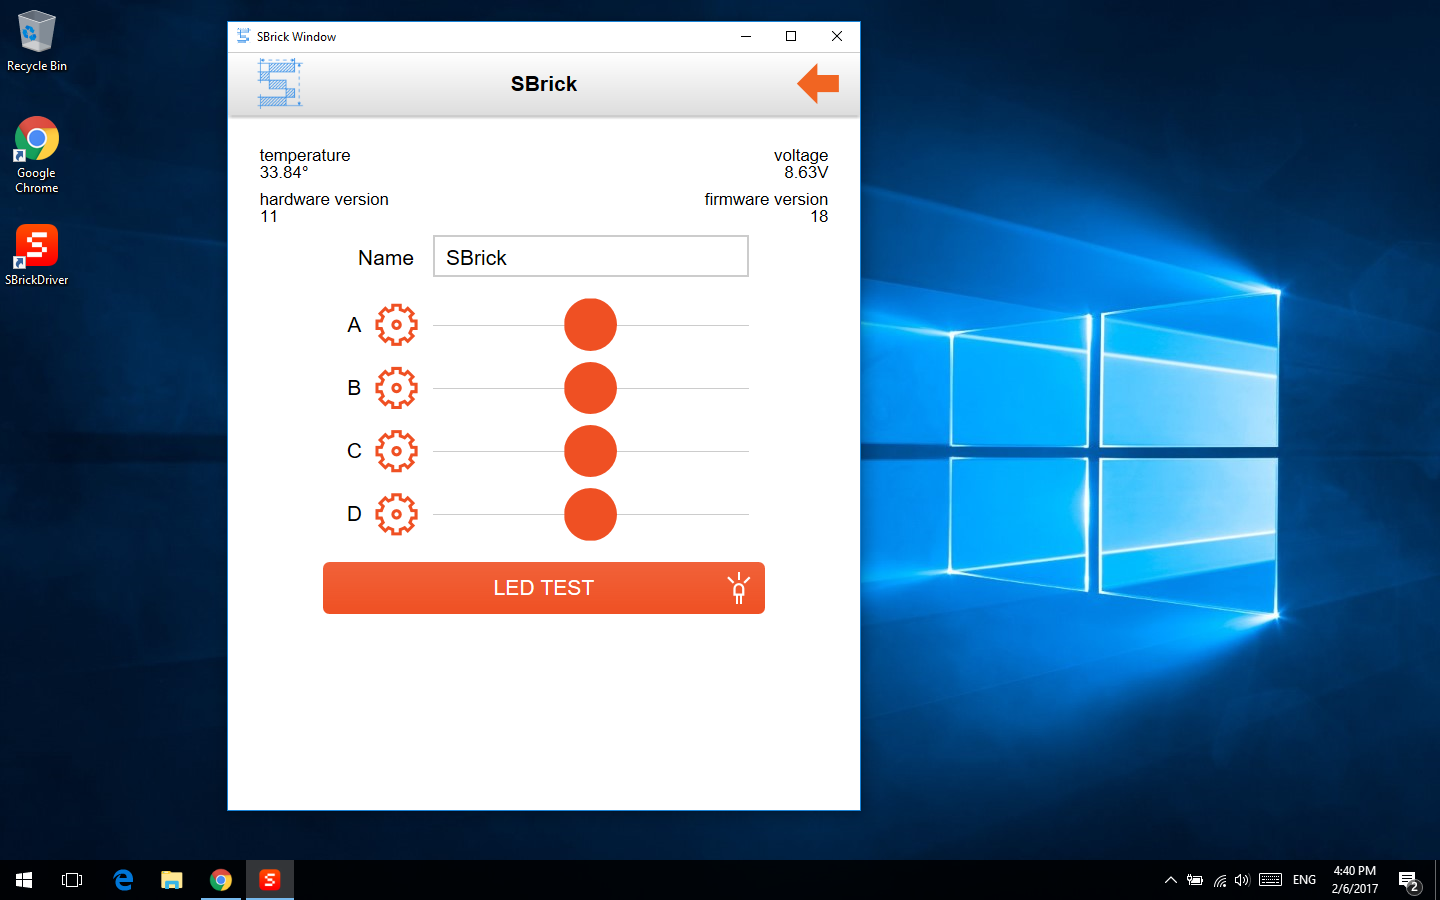
5. Please click to the SBrick again. If the pairing process and the firmware update were successfully, you will see the following menu.
On this screen you can change your SBrick’s name and you can test the ports.
You can switch to sensors by using the gear icon next to the A, B, C or D port.
6. For using the Scratch, first of all you need to create a Scratch File. Just select the "Create New Scratch File" button in the menu
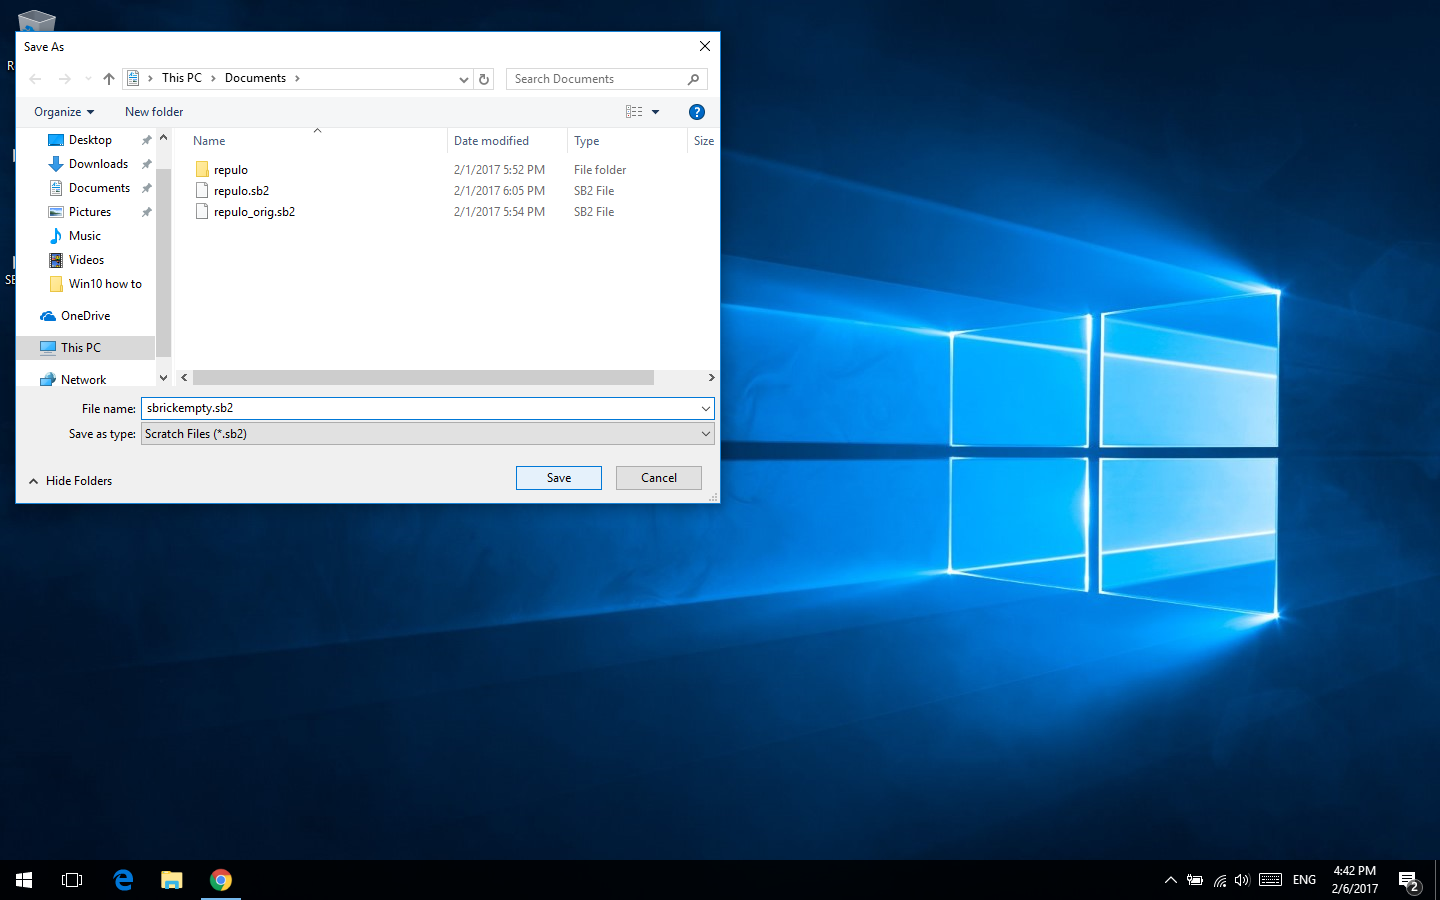
7. Save the sb2 file to your PC.
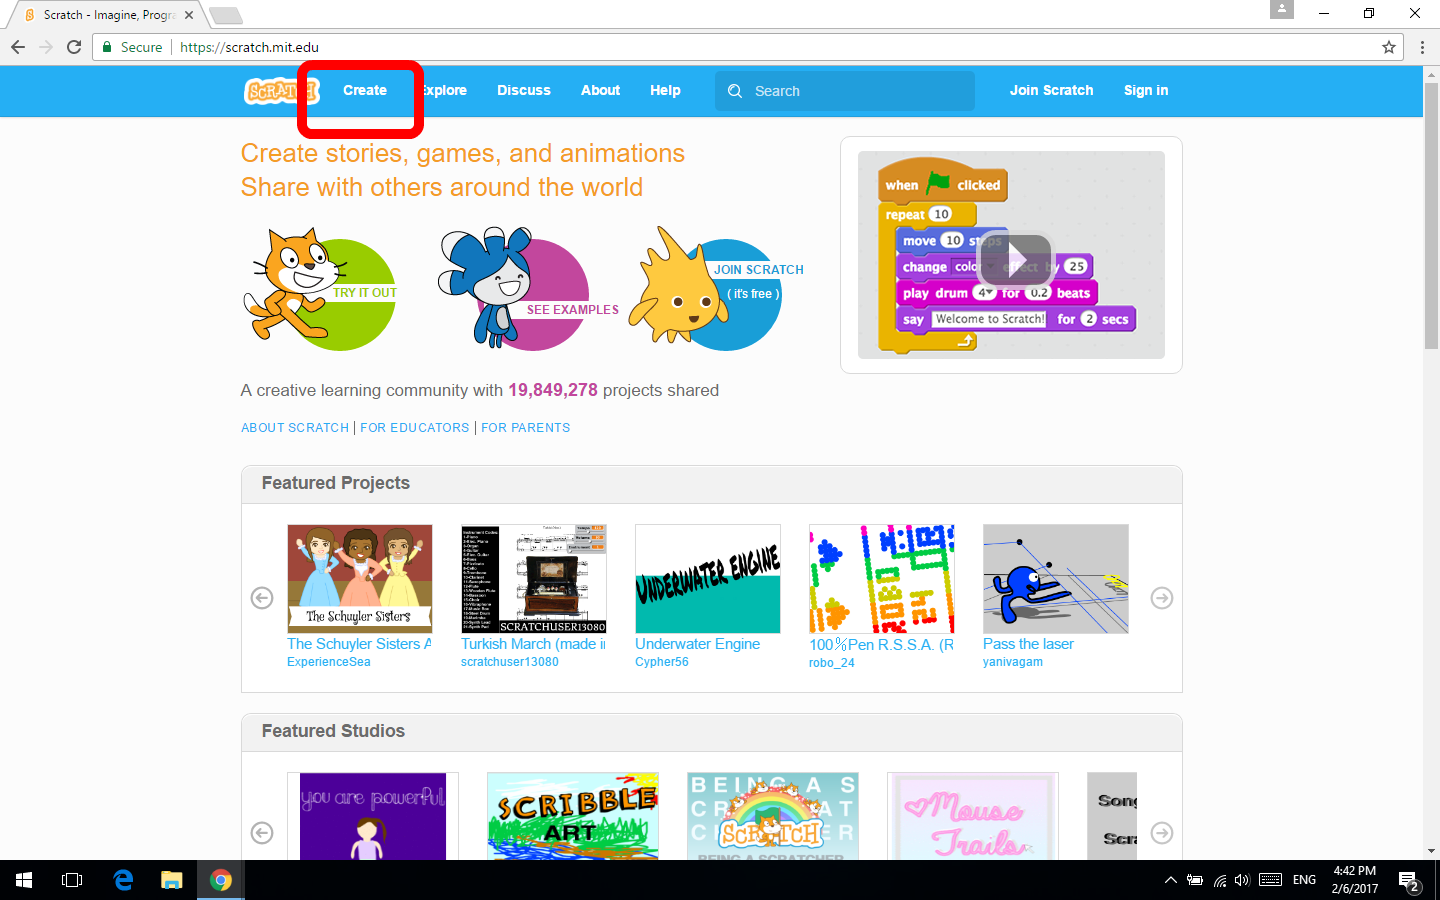
8. Go to: https://scratch.mit.edu/
Supported browsers: Chrome, Firefox or Opera.
For a new project just click to the "Create" button.
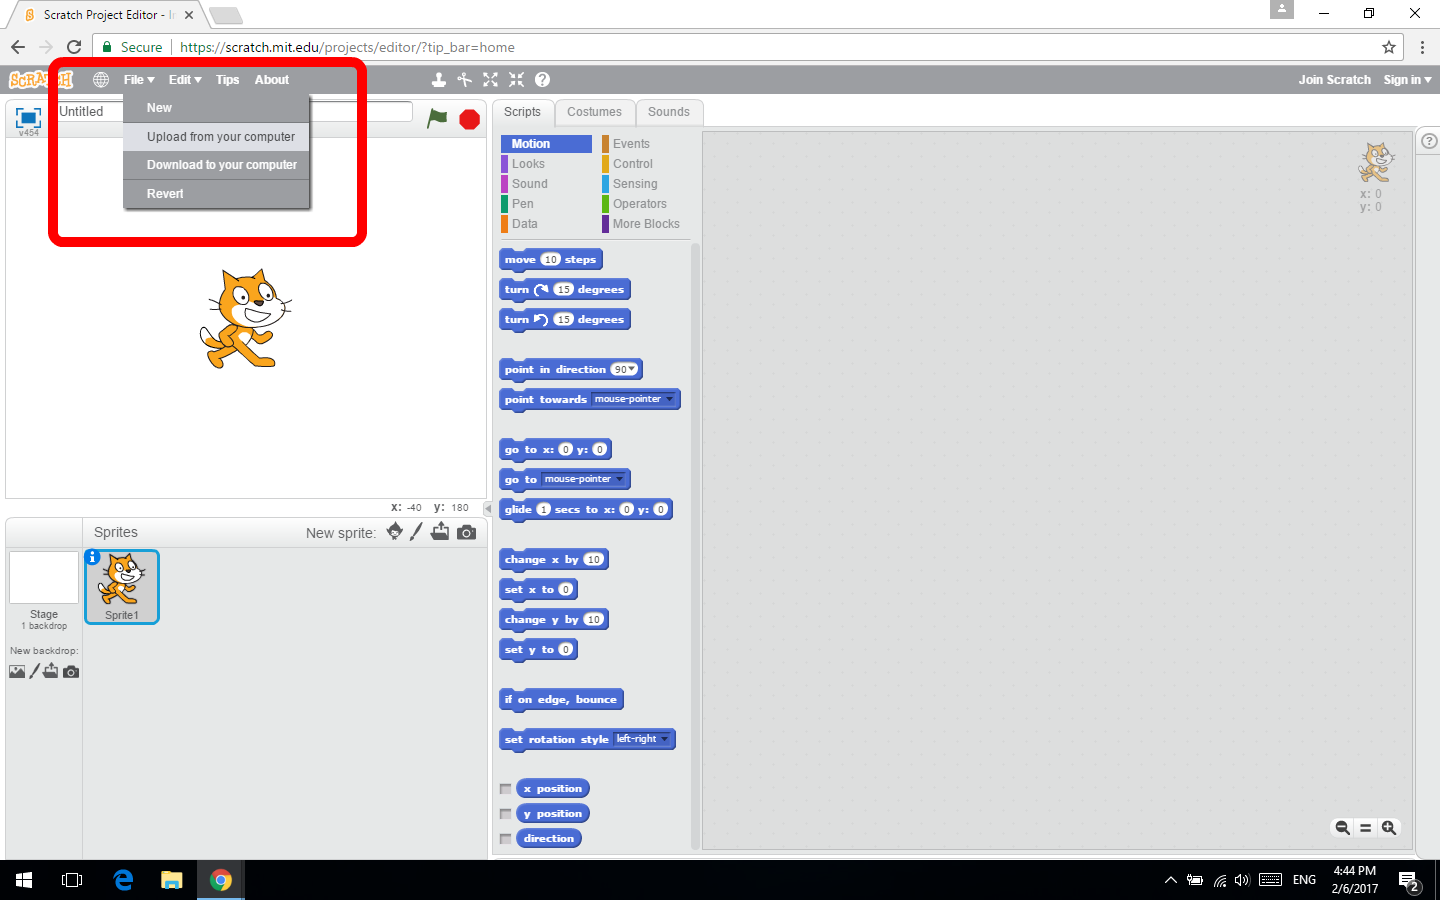
9. The next step: You need to open the sb2 file. Chose the "File" from the menu bar, and select the "Upload from your computer".
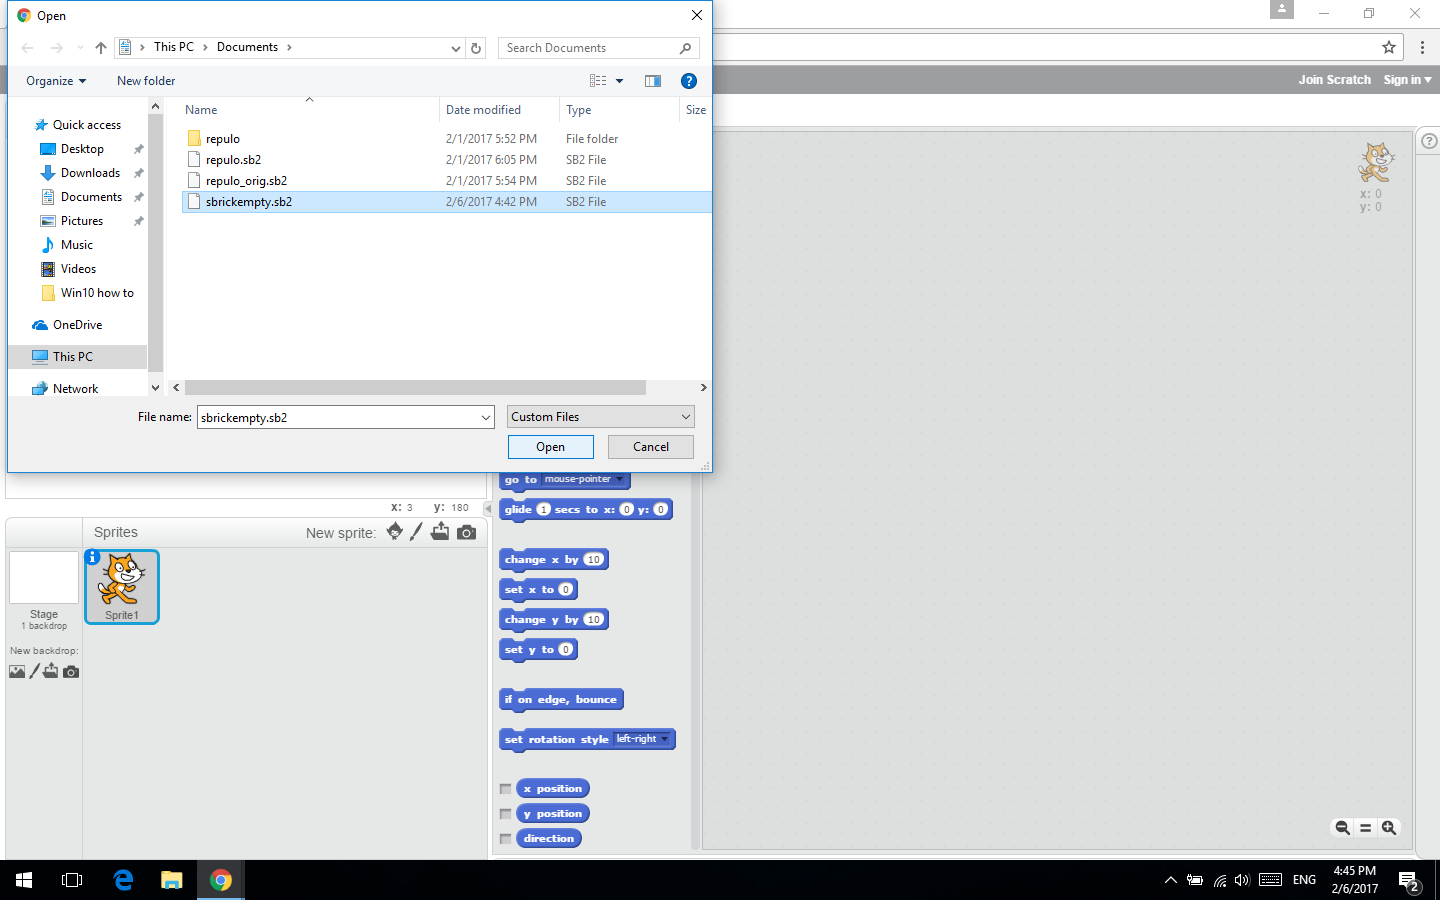
10.. Open your sb2 file.
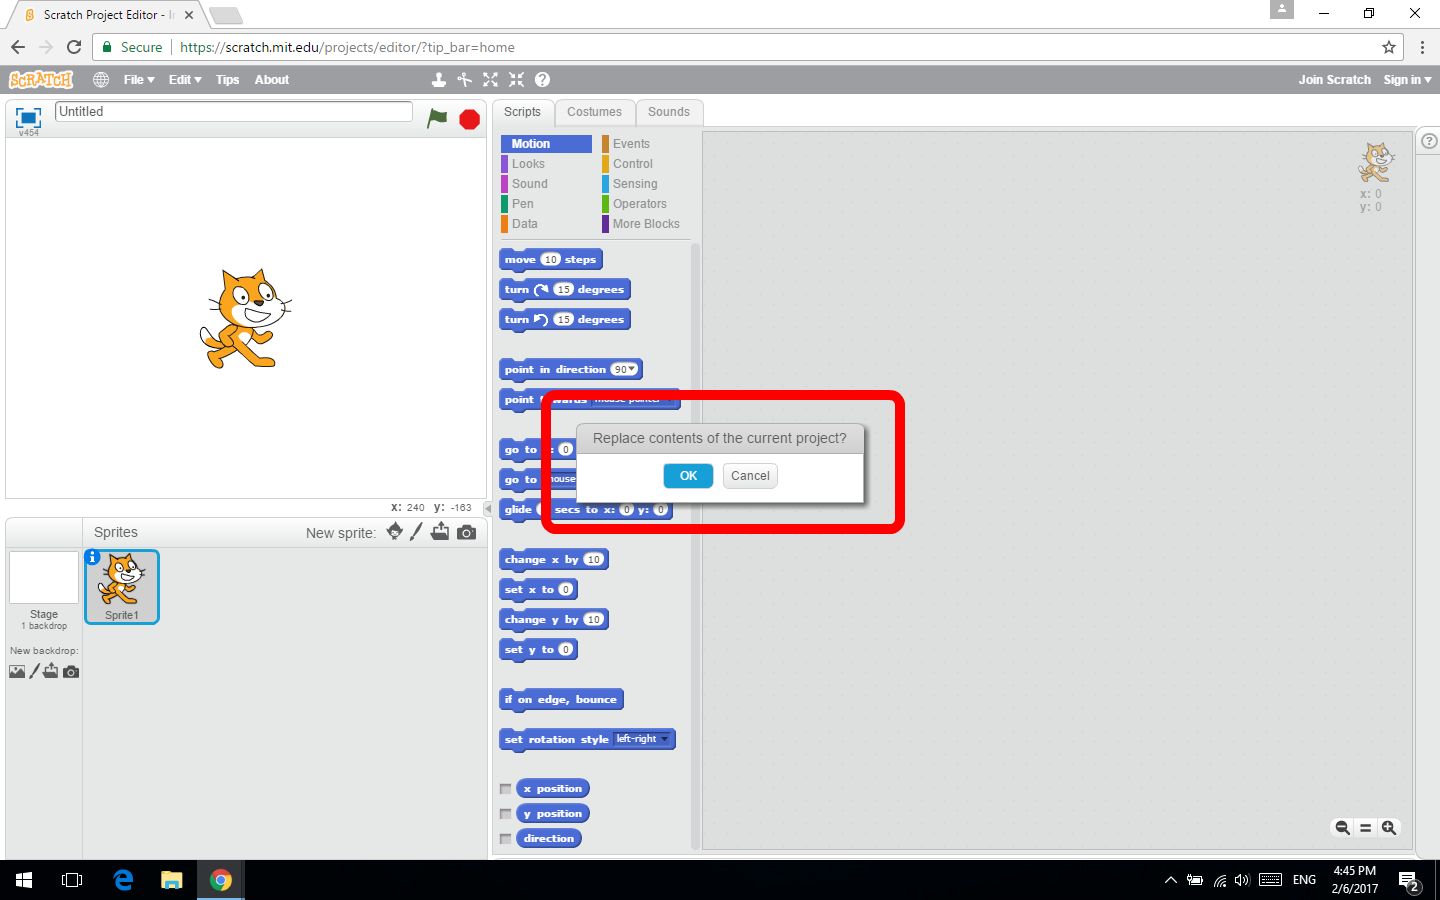
11.. Click to the "OK"
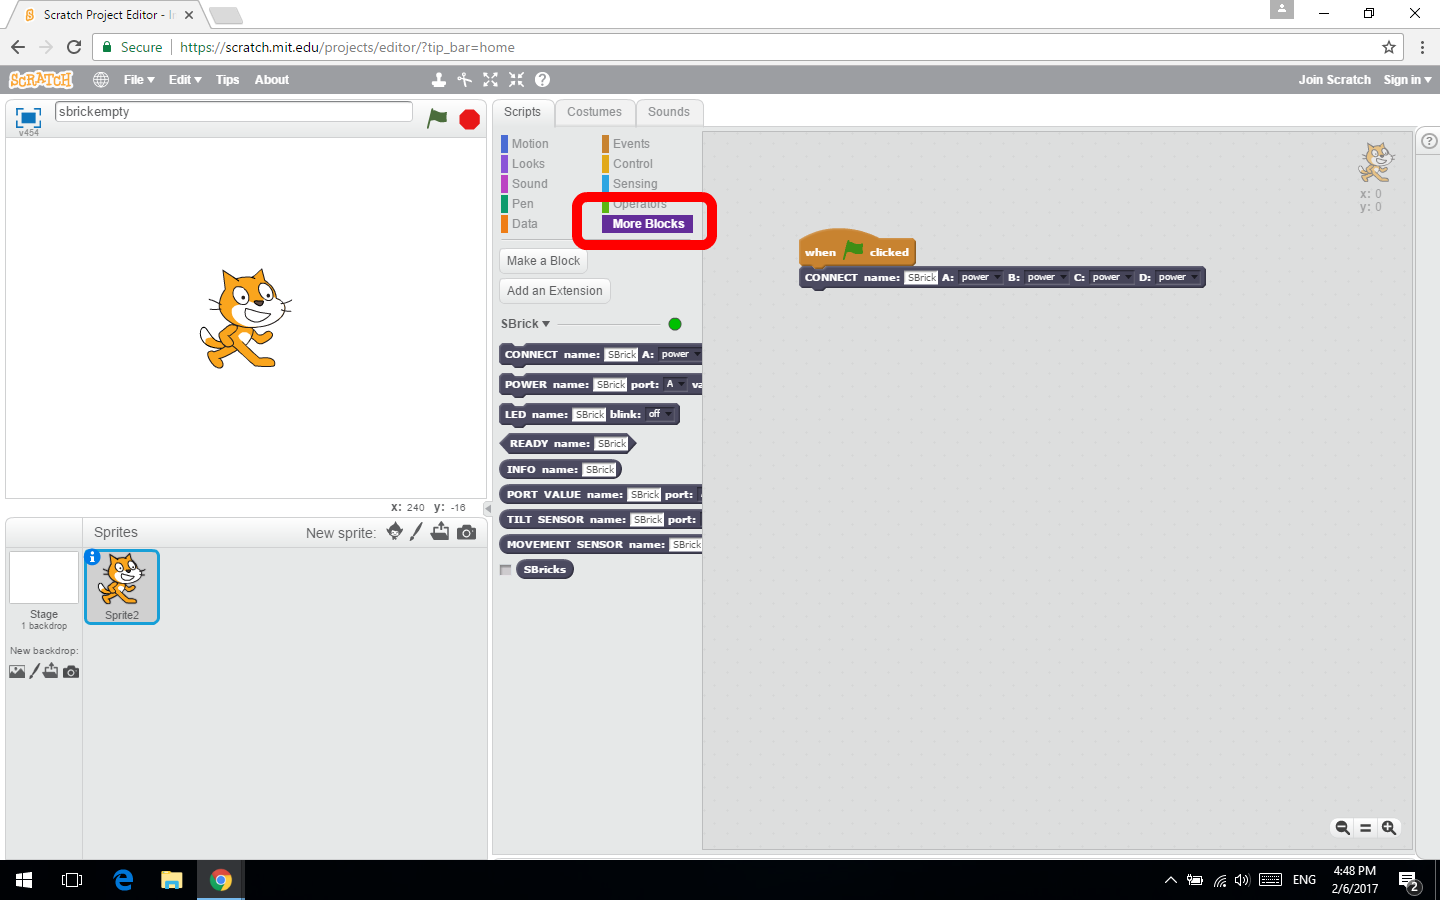
12. Let’s create awesome codes!
You’ll find blocks necessary to control SBrick under "More Blocks".
The green circle on the right of the "SBrick" label means that Plugin is live and it works properly.
You can find more help about Scratch here: https://scratch.mit.edu/help/videos/
If you are a teacher, school or camp that is interested in putting SBrick into your classrooms, please contact us at info@sbrick.com. Educators are eligible for a special educators-only discount.
